Best Fretboard Sanding Tools for Precision Results
By Saanvi Iyer • 2nd May

The Problem: When Fretboard Sanding Tools Fail Your Standards
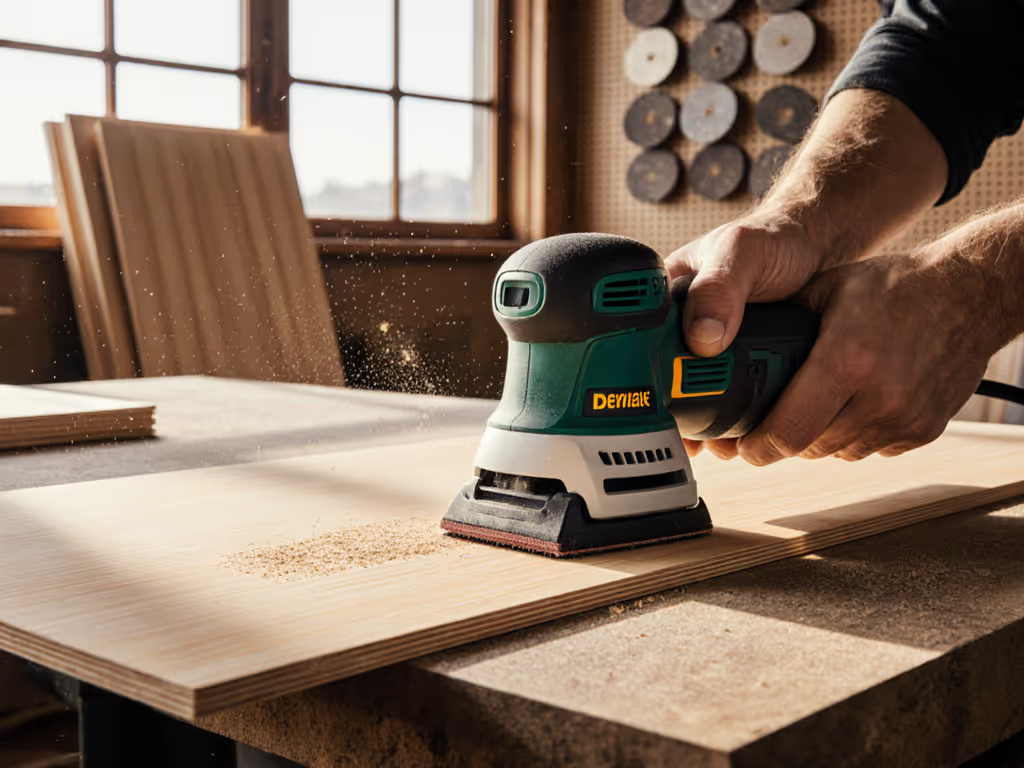
Professional fretboard sanding and leveling demands precision that most generic sanders simply cannot deliver. A fretboard sanding sander that leaves swirl marks, tears wood grain, or generates uncontrolled dust isn't just inefficient, it costs you time, reputation, and sometimes your team's health. Many workshops discover too late that vibration levels reaching 8 to 12 m/s² A(8) across a four-hour shift can trigger hand numbness and tingling in your crew, while poor dust capture allows fine fret dust to accumulate at 2 to 3 mg/m³ above safe occupational exposure limits in indoor spaces.
The stakes are even higher when working on premium instruments. One uncontrolled pass with the wrong guitar neck sanding tools can round a crown, blur fret definition, or generate micro-scratches visible under raking light after finish, rework you cannot easily explain to a client and cannot afford to repeat.
Agitation: Why Your Current Setup Isn't Enough
The Vibration and Fatigue Reality
I once worked with a skilled apprentice who flagged numbness and tingling in his fingers after a full day of fret leveling. His grip strength dropped, mistakes multiplied, and by day three he was mentally checking out, exactly the moment precision fails. We discovered his orbit sander was operating at roughly 10.5 m/s² A(8), well above the 2.8 m/s² A(8) threshold for safe eight-hour exposure under EU standards. Beyond the immediate discomfort, cumulative HAVS (hand-arm vibration syndrome) exposure is irreversible. Many shops don't measure vibration at all, assuming "if it feels manageable, it's safe." That assumption is costly. To compare options that reduce fatigue, see our low vibration sanders comparison.
Dust Capture and Respiratory Class Misalignment
Fretboard sanding generates extremely fine dust, median particle size often under 5 µm. Respiratory class P2 masks (FFP2 equivalent) filter ~94% at best, but only if the seal is perfect and exposure stays below 10 mg/m³. Most bench-mounted fretboard leveling setups without proper extraction allow dust to linger at 4 to 6 mg/m³ in the breathing zone. Without a dust collection system tuned to sub-micron capture (HEPA filtration with at least 0.3 µm efficiency), your crew is protected only in theory. For end-to-end extraction setup, see our HEPA sanding guide.
Inconsistent Scratch Patterns and Edge Control
Fretboard leveling sanders vary wildly in pad hardness, orbit diameter (2.5, 3.0, or 5.0 mm), and abrasive loading percentage. A 5 mm orbit with 80% mesh loading on nickel-silver frets will leave a different scratch pattern than a 2.5 mm hard pad with 60% paper loading on rosewood (both are legitimate tools, but crew members must understand the trade-offs). Confusion leads to inconsistency; inconsistency leads to failures caught only after topcoat. For instrument builds specifically, see our sanders for luthiers for verified swirl-free picks.
Solve: A Data-Driven Approach to Fretboard Sanding Tool Selection
1. Measure and Reduce Vibration Exposure
Start by establishing baseline vibration data for your current toolkit. Use a dedicated vibration meter (ISO 20643 compliant) to measure m/s² A(8) across representative tasks. A random-orbit sander typically ranges 4 to 12 m/s² A(8) depending on pad design, mass, and bearing quality.
Protective steps:
- Choose guitar neck sanding tools with lower-vibration bearings and balanced pad mass (heavier pads often dampen oscillation better).
- Rotate workers every 15 to 20 minutes between sanding and non-sanding tasks; document exposure minutes and track cumulative daily dose.
- Use anti-fatigue mats under standing work stations to reduce whole-body vibration transmission.
- Fit hose and cord suspensions to eliminate weight-loading on the operator's wrist; a poorly supported hose adds 200 to 400 g of effective load, increasing vibration perception and fatigue.
The goal: keep exposure below 2.8 m/s² A(8) daily, or document exposure levels and implement compensating controls if higher tools are unavoidable.
2. Dust Control Hierarchy for Indoor Fret Work
Dust containment starts with tool selection. Here's the hierarchy:
Tier 1: Extraction-Ready Tool Design
- Select orbital or random-orbit fretboard leveling sanders with compliant dust ports (typically 32 mm or 35 mm European standard) that accept extraction hose without leakage.
- Verify the pad interface hole pattern matches your extraction system (not all 5-inch pads are created equal; a misaligned hole pattern reduces capture by 30 to 50%).
Tier 2: Extraction Unit Sizing
- Pair sanding equipment with a HEPA-filtered vacuum rated for continuous duty, sized to deliver at least 100 CFM (170 m³/h) at the tool inlet with 50 mm hose.
- Confirm the vacuum's final filter is rated for sub-micron capture (e.g., HEPA H13 or H14); standard paper filters allow fine fret dust bypass.
- Empty collection bags frequently; a clogged bag reduces suction within 1 to 2 hours, drastically lowering dust capture efficiency.
Tier 3: Respiratory Protection
- Use P2/P3 masks (FFP2/FFP3) as secondary control only, not primary.
- Fit-test masks before each job; a loose seal negates filter efficiency entirely.
- For high-volume fret work (full-day leveling operations), consider powered air-purifying respirators (PAPRs) with P3 filters and continuous air supply.
Target outcome: maintain dust levels below 1 mg/m³ in the breathing zone during active fret work (measured via personal air sampling).
3. Selecting the Right Tool for Your Substrate
Rosewood and Padauk Fretboards:
- Use 220 to 240 grit mesh abrasive on a 2.5 to 3 mm orbit, random-orbit sander with a medium-hardness pad (Shore A 60 to 65).
- Mesh abrasive (vs. paper) clogs less on oily woods; the open structure allows dust to clear faster, reducing clogging and heat build-up.
- Apply light pressure; let the tool do the work. Aggressive downforce accelerates wood burnishing and creates tearout.
- Progress to 320 grit, then 400 grit for final leveling passes; jumping more than one grit causes visible scratches that are hard to polish out.
Maple and Hard-Maple Fretboards:
- Start with 180 to 220 grit, 3 to 5 mm orbit, harder pad (Shore A 70+) to bite through the dense surface.
- Maple generates less fine dust than rosewood but produces compact chips; ensure extraction is active and uninterrupted.
- Transition to 320 grit for crown refinement; hand-file small imperfections rather than over-sanding (maple doesn't feather easily).
Stainless-Steel Frets (Nickel-Silver Frets):
- Use 240 to 320 grit carbide abrasive, 2.5 to 3 mm orbit, hard pad (Shore A 75+).
- Stainless generates more heat; reduce downforce to minimize friction and allow frequent cooling breaks.
- Clean the tool frequently to prevent metal particle embedding in the pad; embedded particles create deep scratches.
Protect hands, lungs, and tempo; the finish will follow.
Maple Fretboard Finishing: Once leveling is complete, transition to final-grit finishing (500 to 600 grit on softer abrasives) to burnish the maple and prepare for oil or stain. Over-sanding beyond 600 grit offers diminishing returns and extends cycle time without improving visual results. Map your steps with our sandpaper grit progression guide.
4. Interface Pads and Abrasive Loading for Edge Control
Edge burn-through is the silent killer in fretboard work. When pad hardness doesn't match wood density, edges round or frets blunt. Similarly, abrasive loading percentage (the density of grit bonded to the mesh or paper) affects finish quality:
- Low mesh loading (50 to 65%): Fast cut, lower dust, but more scratches visible post-finish. Use for aggressive material removal.
- Medium loading (65 to 80%): Balanced approach for most fret leveling; good cut speed and acceptable surface finish.
- High loading (80 to 95%): Slower cut, finer scratch pattern, higher clogging risk on oily woods. Reserve for final-pass refinement.
Pair a 2.5 mm hard pad with 65 to 75% mesh loading for most standard leveling; switch to a 3 mm medium pad if you need slightly more edge forgiveness (thicker pad edges round less aggressively). For pad foam densities and interface options, check our sander pad types guide.
5. Hand-Tool Integration for Precision Edge Work
Power tools excel at bulk leveling, but hand files and diamond-plate leveling stones handle corners, fret ends, and micro-adjustments without the risk of orbital swirl. Integrate a sequence:
- Power leveling: Random-orbit sander, 220 to 240 grit, establish overall crown and level.
- Hand-finishing: 320 to 400 grit hand block or leveling beam to blend and refine.
- Edge detail: Fret dressing file or 400+ grit stones to clean fret tops and ends without marks.
- Final burnish: Light 500 to 600 grit pass by hand or low-speed buffer to unify scratch pattern.
This three-step approach protects fret definition and allows precise control near board edges.
6. Documenting Your Process
Create a simple one-page SOP (Standard Operating Procedure) for each fretboard substrate and tool combination. Record:
- Tool and pad specification (sander model, orbit size, pad Shore hardness).
- Grit sequence and dwell time (e.g., 220 grit: 4 passes, 240 grit: 3 passes, 320 grit: 2 passes).
- Extraction settings (vacuum CFM, filter status, dust bag emptied yes/no).
- Vibration and noise baseline (m/s² A(8), dBA at ear, operator rotation interval).
- Respiratory protection (mask type, fit-tested, P2 or P3).
- Crew member name and date (accountability and traceability).
When a new apprentice joins, they follow the documented recipe, not guesswork. Consistency improves; surprises diminish; hand tingling and fatigue stay off the radar.
Actionable Next Steps
This week:
- Measure vibration on your current fretboard sanding sander using an ISO 20643 compliant meter or contact the manufacturer for published m/s² A(8) data. If levels exceed 4 m/s² A(8), research lower-vibration alternatives or budget a tool upgrade.
- Run a 24-hour dust study: place passive dust monitors (settling plates or air samplers) in your work zone while actively sanding. Compare results to your local occupational exposure limit (typically 1 to 3 mg/m³ for fine wood dust). If capture is poor, your extraction system may need a stronger vacuum or HEPA filter upgrade.
- Photograph your current guitar neck sanding tools setup: tool, pad, abrasive type, extraction hose diameter, and vacuum. Note any visible clogging, hose damage, or disconnections.
Next two weeks:
- Test a lower-vibration sander (if available via rental or borrowed equipment) on a representative fretboard. Record job time, surface finish quality (use raking light), and crew feedback on hand fatigue. Compare to your baseline.
- Audit your dust collection: confirm filter type and change interval, check for hose leaks, verify the pad-to-vacuum port alignment. If the fit is loose, seal it with high-temperature tape or replace the interface.
- Draft a simple one-page SOP for your most common fretboard substrate (e.g., rosewood or maple) including grit sequence, tool settings, and safety checks. Test it with a crew member unfamiliar with your current process and refine based on feedback.
This month:
- Invest in a vibration meter (one-time cost: $200 to 500 USD) or borrow one from a tool supplier. Establish vibration baseline data for all your active sanders. Document exposure times and rotation schedules to prove compliance with HAVS standards.
- If dust levels or vibration exceed safe thresholds, prioritize either a tool upgrade or a process redesign (shorter exposure, frequent breaks, better extraction). Calculate the ROI: is a $1,200 lower-vibration sander worth the avoided workers' compensation claim or crew downtime? (Spoiler: yes, often by orders of magnitude.)
- Roll out your documented SOPs to the crew. Hold a 15-minute safety stand-down to explain the new process, show raking-light finish photos (good vs. poor), and emphasize hand/lung protection as non-negotiable.
Remember: when your crew's hands feel good, noise drops, and dust stays captured, the fretboard surface quality almost always improves. You are not sacrificing speed for safety, you are building a system where both align. Protect hands, lungs, and tempo; the finish will follow.
Related Articles